

本文摘要:
本文介绍了一种通过浏览器扩展程序去除百度百科页面图片水印的方法,分为程序版本与油猴脚本版本两种。程序版本通过拆分图片链接,删除水印参数部分;油猴脚本具体实现了自动替换图片链接为无水印格式,并提供页面加载与动态内容检测功能,以确保所有插入页面的图片都被处理。脚本使用了 load 与 MutationObserver 事件监听,并定期执行检测更新,便于用户浏览或保存高清无水印图片。
— 本文部分摘要灵感源自 DeepSeek 深度思考 ✨
![图片[1]|百科图片去水印版程序+油猴脚本|不死鸟资源网](https://busi.net/wp-content/uploads/2025/06/20250613072125582-image-1024x628.png)
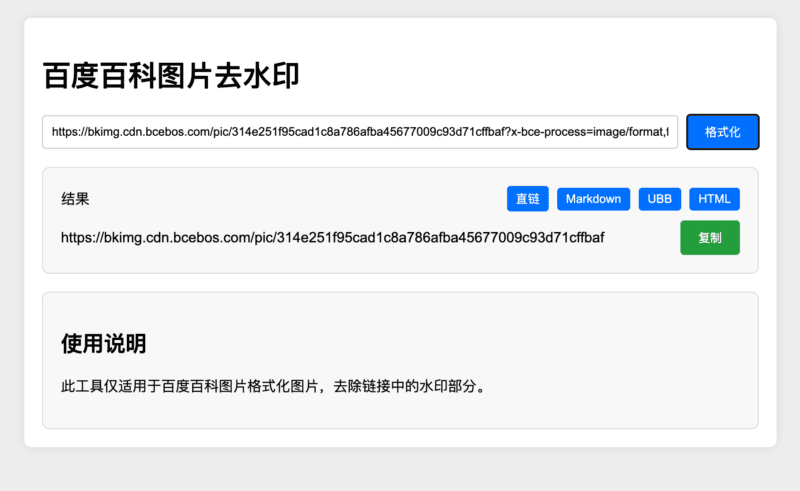
直接浏览器删掉后面部分最简单了,硬要程序版本
这种简单需求直接两句话发给 AI 就能得到了。
![图片[2]|百科图片去水印版程序+油猴脚本|不死鸟资源网](https://busi.net/wp-content/uploads/2025/06/20250613072142267-image-1024x680.png)
![图片[3]|百科图片去水印版程序+油猴脚本|不死鸟资源网](https://busi.net/wp-content/uploads/2025/06/20250613072152686-image-1024x685.png)
油猴脚本版:
复制内容添加到篡改猴,每次访问到这种图片会自动替换成无水印图片,便于直接浏览或保存。
// ==UserScript==
// @name         百科图片去水印
// @namespace    http://tampermonkey.net/
// @version      1.1
// @description  去除百度百科图片链接中的水印部分
// @author       大佬论坛
// @match        *://baike.baidu.com/*
// @grant        none
// ==/UserScript==

(function() {
    'use strict';

    // 定义一个函数来处理图片链接
    function removeWatermarkFromImageUrl(url) {
        return url.split('?')[0];
    }

    // 更新图片链接
    function updateImageUrls() {
        const images = document.querySelectorAll('img');
        images.forEach(img => {
            const originalSrc = img.src;
            if (originalSrc.includes('bkimg.cdn.bcebos.com/pic/')) {
                const newSrc = removeWatermarkFromImageUrl(originalSrc);
                if (newSrc !== originalSrc) {
                    img.src = newSrc;
                }
            }
        });
    }

    // 监听页面加载完成事件
    window.addEventListener('load', () => {
        updateImageUrls();
    });

    // 监听页面动态加载的内容
    new MutationObserver((mutations) => {
        mutations.forEach(mutation => {
            mutation.addedNodes.forEach(node => {
                if (node.nodeType === Node.ELEMENT_NODE) {
                    node.querySelectorAll('img').forEach(img => {
                        const originalSrc = img.src;
                        if (originalSrc.includes('bkimg.cdn.bcebos.com/pic/')) {
                            const newSrc = removeWatermarkFromImageUrl(originalSrc);
                            if (newSrc !== originalSrc) {
                                img.src = newSrc;
                            }
                        }
                    });
                }
            });
        });
    }).observe(document.body, { childList: true, subtree: true });

    // 定期检查并更新图片链接
    setInterval(updateImageUrls, 1000);
})();
本站文章部分内容可能来源于网络,仅供大家学习参考,如有侵权,请联系站长📧ommind@qq.com进行删除处理!
THE END